DIY : Antique Door Chalkboard and Inspiration Board Tutorial


There are TONS of tutorials on how to take an antique door and transform it into a chalkboard but I've had this baby tucked away for about a year now... and, well, it felt like it was finally time to piece it together and share it with y'all.

So grab your electric sander, paintin' pants and some good tunes.

Let's rock 'n roll. 


Supplies
electric sander
sand paper
several old rags
roller brush /  big-bristled paint brush
paint
antique glaze
[i also used the antique glaze from the Caromal Colours Reclaim line]
painter's tape
chalk


Step 1
Find an awesome antique door for a super low price.
Bring it home and set up shop.
My vision was to have a five panel door so that I could make four panels into chalkboards and create a cute design for the middle panel. My parents actually found this for me at an antique shop about an hour away from Huntsville.

Step 2
Paint the door the color of your choice.
I placed painter's tape over the door knob plate because it would add some contrast to the door.


Step 3
Break out a piece of sandpaper.
Sand the edges, corners and even brush along the surface in some falt areas to create the distressed look.
I love the rich brown of the original paint color that appears under the white.


Step 4
Wipe the debris of the sanded door away with an old, dry cloth.


Step 5
Paint antiquing glaze over the entire surface of the door and wipe away quickly with a damp cloth.
Paint the sanded areas more heavily if you'd like a deeper distressed look.
You can also use a flicking motion with a coarse-bristled brush to create splatters (see the example in the bottom three pics -- I blotted the the splatters so that they looked more natural and not so heavy).


Step 6
Place painter's tape around the edges of your panels.
Paint the magnetic primer on first if you'd like a magnetic chalkboard.
{I used the Rust-oleum Magnetic Primer but it doesn't hold magnets very well...}
Roll on the chalkboard paint (follow directions on the package for drying time and coats).


Step 7
Remove painter's tape after about a day of drying.
If you're lucky, the tape will remove some bits of the painted surface so that it gives even more of a distressed look - and you didn't even have to work for it!
Draw over entire chalkboard surface with a piece of chalk and erase.

Step 8
Nail some hooks and wire on the back, find the perfect place to hang it and...
voila! 


Hammer a decorative upholstery nail onto each side of the door and loop a string of twine around each one.
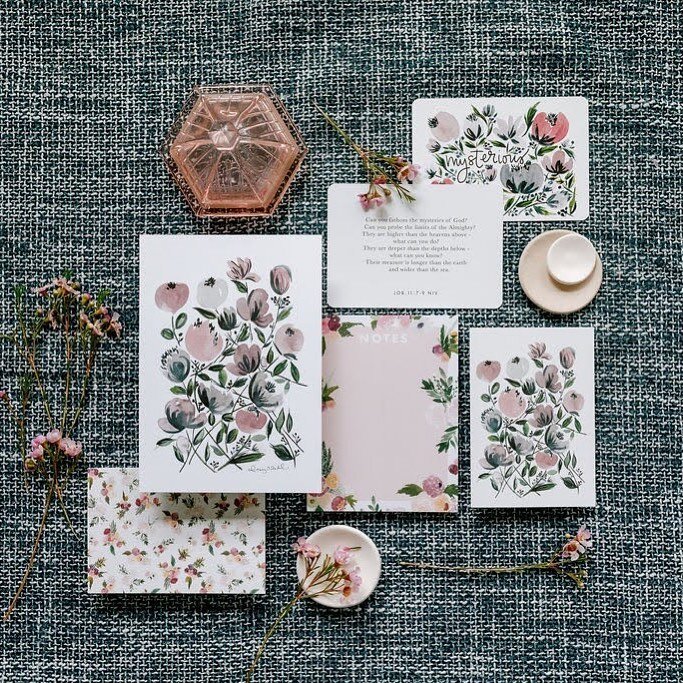
Hang inspiration pieces (such as buttons, ribbons, paint samples) and there ya have it: inspiration board, chalkboard and gorgeous piece all-in-one!


Etsy Shop : Business Printables Package {Customized}


Announcing the Business Printables Package!!

Conduct written documentation in the same manner of conducting business: with creativity and style.

This set includes a memo template, fax template and an agenda form.

Each document is customized for your company in the header section 
[Company Name]
[Address]
[Address]
[Phone Number]
[Email]

Would you prefer a different color palette or to add your logo?
No problem.
Send us your preferences in the message box and we will alter the design to fit your business needs.

You can find this awesome bundle of printables here.


We are always looking for more ideas when designing our printables. This week we are asking YOU to help us come up with ideas so that we can better fit a certain area of expertise that may not be represented in the "printables" world. We will design a set of [up to 4] printables especially for you for free when you send us your profession and types of lists / forms needed to fit your specific needs. 

For example, if you're a photographer, we will create a set of printables that includes a checklist of equipment to bring, client list form, checklist of photo ops, the day's agenda, etc.

You send the details, we'll create the design!

After we email you the PDF files, we will list similar designs in our Etsy shop for sale so that others can enjoy them too!

Free Printable!! Finding Our First Home with a House Searching Score Sheet


If you follow me on Pinterest, you have probably noticed a lengthy feed of house renovation inspirations. We haven't bought our first home yet but we are looking heavily.

It all started when I was searching on Trulia and Zillow for houses in our price range. We were debating between buying an old house and putting some elbow grease into it or just breaking down and buying a new home (aka: the cookie cutter). 

Everything we looked at in our range looked cheap (granted, our price range is super, super low). It was hard to imagine that we would ever move out of our spacious apartment into a home that we could really call home.

Then my mom sent me an email of one that we fell in love with

Borderline obsession.

It was an older home (1960s) but the family renovated it in such a perfect way. 
Barnwood accent wall.
Butcher block countertops with double oven and green accent cabinets.
Real brick and mortar backsplash.
Bathroom cabinets were made out of repurposed vintage dressers with amazing sinks.
BEAUTIFUL hardwood flooring throughout and true tile (not laminate) in the wet areas.
Awesome backyard and patio.
Lovely full brick exterior with heavy barnwood shutters.
Best of all? They converted the garage into 3/4 of a large sunroom and 1/4 of it as a laundry room.
The sunroom would be my new studio.

AND - we had the exact 20% down payment stashed away. On the dot.

I could picture it all... until we put in our offer and the agent said someone else had offered the full listing price. 

Devastation.

After a number of shed tears, JD gave me the sweetest pep talk. He reminded me that God didn't intend for it to be our first home, but rather our inspiration. We would find an older home and give it the same love and care as that couple did for the home we fell in love with. We could do that too. We just needed to find a home with a nice floor plan, a bedroom that our queen-sized bed could actually fit in (not a whole lot of those in our price range), a couple of bathrooms, a room for my studio, and a great backyard for gardening. 

We pulled our bootstraps up, found a great real estate agent and have been searching ever since.

Houses seem to get a little redundant after you've seen a few, so I decided to make a scoring sheet for each house. If you work with a realtor, she / he will normally give you an MLS sheet on the house. This describes the specifics: square footage, number of bedrooms and bathrooms, size of rooms, appliances included, etc.

You can write notes on these sheets but I prefer charts and checklists. After looking at a couple of houses, I decided to design the survey below. It's a free printable and we would love for you to use it if you think it would help in your house search too!

Today, we continue in our adventure for buying our first home with clipboard in hand:


Lovely clipboard from the dollar bins at Michael's

How to Use the Printable:
Write the house address at the top. When you're finished looking at houses for the day, rank them in the top right-hand corner. (example: 1/6)

Basically, I created a scale from 1 - 10 for the appearance of the neighborhood, exterior of house, bedrooms, bathrooms, kitchen and backyard. For closet space, I rate it on how much space there is, the appearance of the closet, etc. For elbow grease, I rate it from 1 (being not a whole lot of work needs to be put into it on our part) or 10 (may need to demolish the whole thing and rebuild it from the ground up). There should be enough space between the lines for you to write notes on each topic.

At the bottom, you'll find a Notes box and places to check off if there is a garage and laundry room, as well as the types of flooring in the house (carpet, hardwoods, tile, laminate).

Most importantly, the question of if you can make it a home... 
Yes, you can make any house a home
but think about if it's worth it.
Is it worth investing into?
Does it have charm / character or can you add that yourself?

**If you choose to share this free printable on your blog or website, please give credit where credit is due and link it back to our blog, Jitney's Journeys. 


Right-click, save image, then print. May be printed on a 5" x 8" index card.

We hope this helps in your search of a home! 

Don't forget to check out our other printables in our Etsy shop here.


DIY Blog Design : How to Add a Social Media Bar to the Bottom of Posts {Step-by-Step Tutorial}


Would you like to add a social media bar to the end of every post?

Something that looks a little something like this:

Great news - we're going to show you how!!

Most of you probably won't need this entire step-by-step tutorial but we wanted to offer it up just in case.

First step: Go to Share This

http://sharethis.com/

This site offers several ways to add a toolbar but we'll show you how we created the one for our blog.

STEP 1: Get The Button
Click "Get it now" in the Multi Channel box


STEP 2: Pick Your Platform
If you use Blogger (or blogspot), click on this button.


STEP 3: Stylize It
You can pick whichever style you'd like but we went with the horizontal, simple look (no visual stats). The last choice is the vertical style that you may have seen on some blogs.


STEP 4: Customize
This is where you can pick your thumbnail size (we decided on the large icons).


STEP 5: Customize Your Icons
Scroll down and you can drag the social media buttons from the right side and add it to the "Selected Services" box on the left side. Put it in the order you prefer and click "FINISH: Get the Code".


STEP 6: Sharing Preference
You can choose between Multi Post or Direct Post. We like the Multi Post because it doesn't take our readers away from our site. Click your preference and hit "GO!"


STEP 7: Add Page Element
You're almost finished...
When you clicked "GO!", it should direct you to Import Page Element from your blog. Click on the Add Widget button and Share This does the rest. How easy is that!?


You're Awesome
Here is a screenshot of what our layout page looks like with the ShareThis element.


Mixed Media : She Wants to Grow Old By His Side


Remember the welcome home "sign" we posted on Instagram when JD got back from his last trip?

Well, we wanted to share a little more about it in detail today...


It's actually a 12 x 12 mixed media piece I made JD for his birthday. He was on travel during Valentine's Day and his birthday (Feb 17) so I was really excited to give this to him first-thing at the airport. 

It's funky but we like it that way. 
{Have you seen how we decorate our home?!}

The text says, "She wants to grow old by his side." 

Materials consisted of scrapbook papers, paint, stamps, vintage sewing patterns, old book pages, and antique paper goodies.

JD has a little more scruff than normal in this painting, and he doesn't have a moustache connecting to his beard in real life. In fact, he shaves his moustache every single day but leave a little beard scruff for some of his trips (like this one). But I accidentally gave him a moustache so we're learning to deal with that. :)

Explanation of outfits:
JD wears soccer jerseys on his days off so I thought the scrapbook paper with numbers would be fitting. 
I used the graph paper for the shorts because he carries around a graph paper Moleskine journal to jot down notes for work.
My outfit is pretty self-explanatory. I love high-waisted skirts, shades of blues, bold belts, lace and flowers. 

The back is pretty simple with a piece of chipboard and scrapbook paper nailed to the backside of the canvas...


My gracious parents let me stay with them in Georgia while JD was on his trip. 

Mom thought it would be a fabulous idea to take an online mixed media class together... and it was!!!

To say that I now enjoy mixed media would be a complete understatement. 

When we weren't drive-by-shopping at antique stores and flea markets, we were crafting and creating on endless projects. 

This project was my favorite though. 

JD is one of my greatest inspirations, aside from Christ.

I love growing old by his side.


Who or what is your greatest inspiration?

Cruisin' through the Swiss Alps to Italy...

Happy Tuesday everybody! This past November, we embarked on yet another lovely trip to Germany for one of JD's business trips.  Friends often ask us where we love to travel to most...

Our Top 3 List goes a little something like this:

1. Germany

2. Hawaii

3. Israel

Why does Germany rank as numero uno on our list? These photos should answer that....

This was a part of the scenic ride from Germany through the Swiss Alps to Milano, Italy. Is it not absolutely exhilarating?! JD was able to take two days off so we booked a hotel in Italy and embarked on an adventurous 8-hour road trip. Not gonna lie... I got a tad -way- sick as JD took the curves of the Alps like a pro.

As I sprawled out across the backseat with an excruciating headache and nausea, JD stopped at this amazing lake and woke me up.

"Whit, I know you're not feeling well at all but I had to pull over here for you to see this. I couldn't drive by it without waking you up."

JD ran down this little paved road to see if anything else was down the way worth seeing. I, on the other hand, grabbed a couple of courtesy doggie bags and stuffed them into the glove compartment. 

A gal's gotta do what a gal's gotta do.

And then we saw this lonely park bench and decided that it needed a couple of newlyweds to keep it company...

After taking in the glorious views, we drove a little further south.

The magnificent mountain tops and mustard colored trees paired with the deep evergreens were certainly a sight to behold in contrast to this quaint little town. 

And yet, the views became more immaculate...

I can't even begin to explain the surprise and mystery of this waterfall.

It appeared out of nowhere. We took a turn and -BOOM- waterfall. There it is. 

In the middle of a super tiny town.

A

massive

waterfall.

JD knows that my heart bursts anytime a waterfall is in view. Memories rush into my mind from childhood when my dad would play his 12-string guitar and sing about getting lost while playing in the waterfalls with my brother. 

Not to mention, "Don't Go Chasing Waterfalls" by TLC holds a pretty big place in my heart, as it was the first song I learned how to play on the guitar (second grade). 

JD and I haven't experienced any waterfalls such as this on any other trip (Oahu doesn't have very big waterfalls). So when we

just happened to

drive along a windy road only to see this amazing wonder, we had no other choice but to make another pit stop, take photos and breathe in the fresh autumn air.

We will probably never be able to remember which road we were driving down (except that there was a restaurant somewhere along the road called "Pink Panther Pizza") or how far away we were from our destination...

but that's the entire point of this blog.

As cliche as it sounds, it's not about the destination - it's about the journey. 

So stop every once in a while to breathe in the fresh air;

to drive a little further south and search for the small wonders of nature God has hidden especially for you to find;

and most importantly, to enjoy the journey with someone you love. 

Easter : For He Has Risen


Risen.

There is no sweeter word to celebrate this season of resurrection and redemption.

"And behold, the curtain of the temple was torn in two, from top to bottom. And the earth shook, and the rocks were split. The tombs also were opened. And many bodies of the saints who had fallen asleep were raised, and coming out of the tombs after his resurrection they went into the holy city and appeared to many. When the centurion and those who were with him, keeping watch over Jesus, saw the earthquakes and what took place, they were filled with awe, and said,

TRULY THIS WAS THE SON OF GOD!"

But wait. 

The Father and the Son were not done.

The angel of the Lord appeared to Mary Magdalene and the other Mary and said, "Do not be afraid, for I know that you seek Jesus who was crucified.

He is not here, FOR HE HAS RISEN, as He said."

Matthew 27:51-54, 28:5-6

Not only did He rise from the grave... He walked back to Galilee to chat it up with the disciples and a few other folks. Well, "chat it up" may not be the best phrase to describe His conversation with the disciples, but you get the point. 

Jesus is. 

No word could possibly convey
 the greatness
the love
the character
the justice
the wisdom
the sweetness
the compassion
the grace
the power
the Truth
of Christ.

We pray that we are all able to grasp a mere portion of the magnitude of Christ's sacrifice and atonement for His children this Easter. 


Check out our post about walking the Via Dolorosa (Way of the Cross or Way of Suffering) in Israel here

Vintage Greetings : Easter Inspiration

Snow flurries have been dancing around the past two days here in Huntsville. 

What?!

It may not look like Spring outside - or even feel like it - but the Todd Nest is ready for blooming flowers and the Easter bunny.


The birds are taking over, but that probably doesn't surprise anyone who has seen our home.

Bird nests, bird houses, bird cards, and birds (not real ones, of course).


When I was spending time with my family in Georgia, my grandmother gave my mom and me a huge bag of old greeting cards and postcards (along with the vintage scarves). We sat down at the dining room table and distributed those beauties amongst ourselves. Her and I are very similar but our tastes in vintage greeting cards couldn't be more different. 

We would've been in trouble otherwise.

The first greeting card ("HELLO" with the birds) quickly became my Spring decorating inspiration. I taped the back to 8.5" x 11" kraft paper and framed it with an antique white frame. 

The second greeting card has a vase of seven small flowers you can pull out.
"A Seven Day Cheer Card for You"
Each flower has a sweet quote hidden hidden its petals.
They don't make cards like this anymore, people...
I displayed it in a vintage flower frog. It's just one bonus element of our Easter display in the kitchen (main photo on top collage).

You probably can't tell from the picture but I slid one of the old card boxes between white books to give the glass jar (holding tiny nests) a boost. It has a nice aged tint to it with purple flowers lining the side. The perfect accent.

Vintage spring-themed cards would look breathtaking on a cute indoor Easter wreath or held up by vintage forks in a vase for your Easter dinner centerpiece.


What is your inspiration theme this spring?


A Little DIY Inspiration for Your Thursday...


Do you subscribe to the Better Homes and Gardens emails? 

There is so much inspiration hidden within my inbox because of it. 

In all honesty, I skip over the emails pretty often but with Spring setting in quickly, I need some fresh inspiration. The past email was packed with fantastic-ly fresh ideas you can find here. Needless to say, I've been pinning pretty rapidly this morning. 

The picture above really captured my heart. It's simple, it's lovely and it's super inexpensive. Here's the excerpt from BH & G in how to create this set-up for yourself:

Sharpie Wall Frames

It’s hard to miss the writing on the wall with these show-stopping frames sketched in black marker. Model the frame shapes after ornate versions of the real thing, using antique portrait frames for inspiration. Add diagonal lines at the corners to suggest depth. To highlight the differences in dimensions between your frames and art pieces, hang a three-dimensional sculpture or vase within one frame.


Some may be afraid to cover their walls with Sharpie markings and I don't blame you one bit!
I'm thinking vinyl may be a better route to go. 

Here are a few Etsy shops that have amazing, vintage-inspired vinyl frames:


Here are another couple of projects I will be embarking on from the collection of BH & G grouping:


I love this twine-enhanced vintage key with the subtle, soft background.


These printed maps are pure beauties. You know this traveling couple will be hanging up a series like this in our home!!


Which project will you be trying out this Spring?


Etsy Product Release : Moustache Burlap Tote


And we've got ANOTHER Etsy Product Release!! 

Find the Moustache Burlap Tote Bag here.


It's oh-so-simple and oh-too-cute. 

To be honest with you, I'm quite unsure of the best way to spell moustache. Regardless of your personal preference in spelling it "moustache" or "mustache", this burlap tote bag is the perfect size to hold all of your valuables or party essentials. You can stock it up with fantastic goodies and give it away as a gift. In fact, we think this would be a fabulous tote to fill with wonderful trinkets for a bridesmaid's gift.

The only thing you can't do with this simple tote is tape it above your lips. 


This was the first time I have posed for any of our shop media. In fact, it was a self-photo on a timer. I hope it doesn't look ridiculous... You would tell me if it did, right?

The vintage scarf is from an amazing collection of scarves my grandmother (whom we refer to as GinGin) so lovingly gave me. Not a day has gone by that I haven't had one in my hair (it's been a couple of weeks). 

Back to the tote...
Here are the specifics:

One black moustache is stenciled in the middle of the front of the bag. If you would like a different colored moustache, we would love for you to message us with your preference and we will customize your order without a problem. The backside of the burlap bag is plain unless you would like us to monogram a name or initial across the back for $3 per tote.

HAPPY WEDNESDAY, EVERYONE!!